After the introduction of the Office 365 Groups and Microsoft Teams Governance Toolkit and with the necessary requirements we are now looking into Azure Functions. In our group and team provisioning scenario, we need a little code for provisioning of an Office 365 group and a Microsoft team. Serverless computing with an Azure Function provides the optimal solution for that. Follow these steps to create the function we need for our workflow.
Why Azure Functions
Azure Functions is a solution for easily running small pieces of code in the cloud, named "functions". For our purpose, to create a new Office 365 group (or for running statistics tasks), these functions are perfect. It will take just some (milli)seconds and low compute-time to perform such an operation. If you don't consume a lot of compute time, Azure Functions in the "consumption plan" are more or less cost free, or cost very little money, see Azure Functions-pricing. For more info about Azure Functions, see An introduction to Azure Functions.
Create a Function App
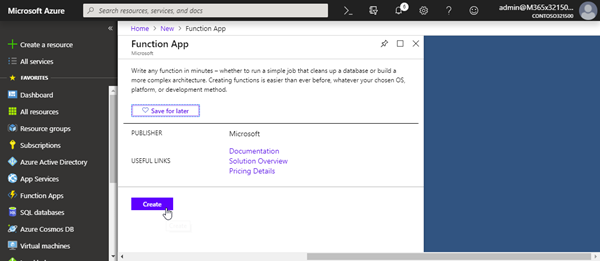
In the Azure Portal, click on "Create a resource" and search for "function". Create a new Function App.
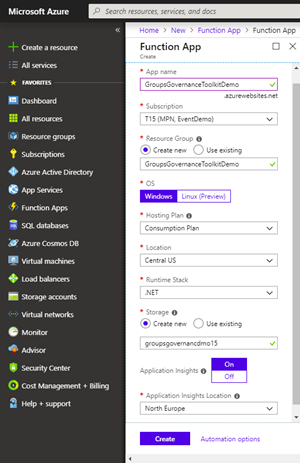
Fill out the Function App form: Provide an App name, the subscription, Resource Group, Hosting Plan "Consumption Plan", a storage account and the region.
The Function App will be ready in about a minute. Go to the resource.
Configure the Function App
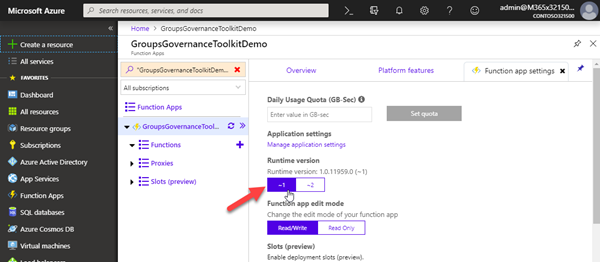
Since our solution is developed in PowerShell, it's important to change the Runtime Stack to Azure Functions v1: Runtime version: 1.0.11959.0 (~1). This can be done in the Function App settings.
PowerShell (based on .Net Core) support was announced at Ignite for Azure Functions v2 and will be available in the next months. So, until then we must use version 1 to have PowerShell support in Azure Functions. Ensure that you have that version selected as shown above. Alternatively, the code could be developed in another supported programing language in v2, as in C# (.Net Core).
Note: why PowerShell? Why not C#? We got that question a lot. The intention of the Governance Toolkit is to provide a solution which is easy to consume and to redeliver within your own environment and without the help of a developer. We don’t fight technology war’s. ![]() If you are IT pro or DevOp or Developer: take the solution and adapt it on your terms.
If you are IT pro or DevOp or Developer: take the solution and adapt it on your terms.
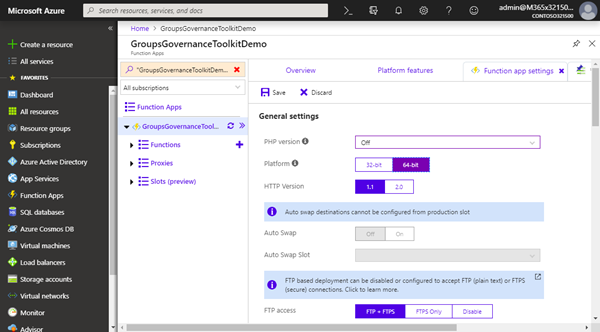
Also, it makes sense to switch the platform to x64 (if we upload any PowerShell modules from a x64 client), to switch off PHP (we don't need that), etc. These steps are not required, but make sense in most cases e.g. if you upload x64 libraries to the functions and use them in your code).
Click "Save" after changes have been made.
Add our Groups Governance Toolkit App Settings
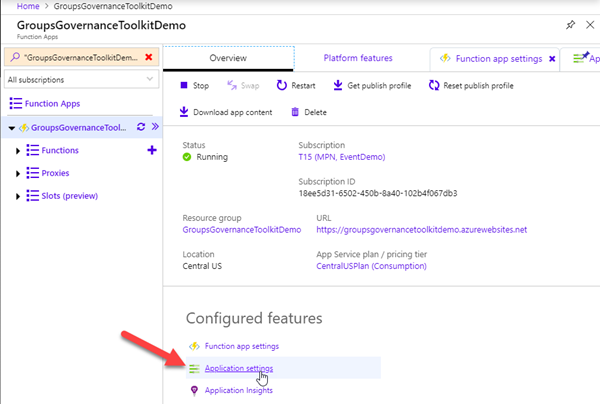
Now there comes the app settings part. We need our app data from the previous step for all functions and we want to store them in a central place. That's the Application Settings in that Function App. Go to the "Overview" and click on "Application settings".
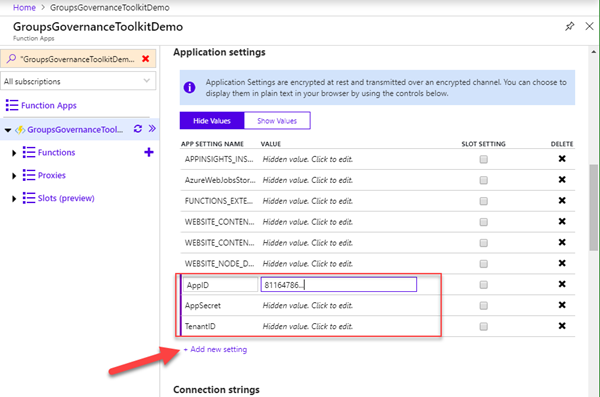
Now, add the values from our created app as shown here. We need keys for AppId, AppSecret and TenantID with the values we saved before. Create the three settings with the "add new setting" link.
Click "Save" after the three keys have been added. After that, we are done with the app settings and we can start using them in our functions.
Note: In real world scenarios, it is recommended to use Azure Key Vault to store secrets. For our demo and for other samples, the Application Settings are good enough.
Develop the Group provisioning function
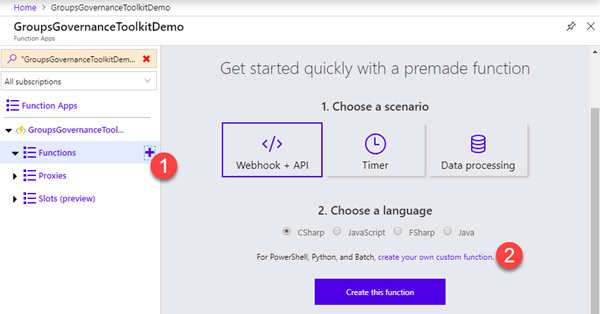
Now comes the easy part. Click on the Plus icon to create a new function.
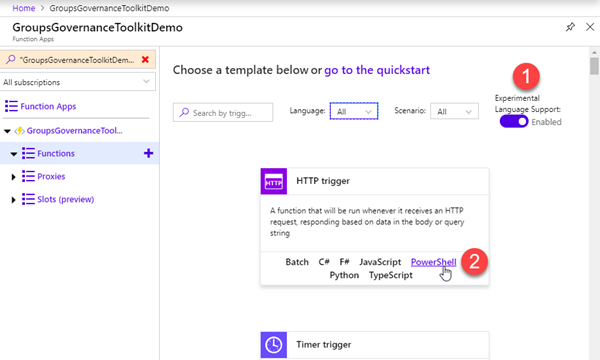
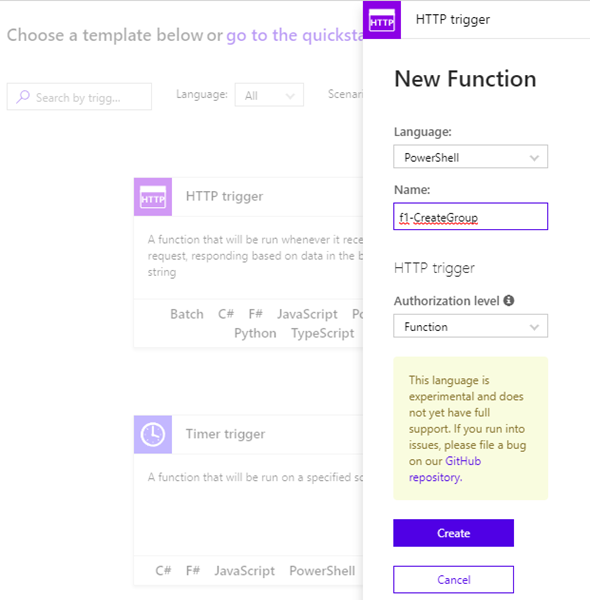
Click on "Experimental Language Support", so that it shows "Enabled". Then, click on the "HTTP trigger" PowerShell link.
Name the function "f1-CreateGroup" and "Create" it.
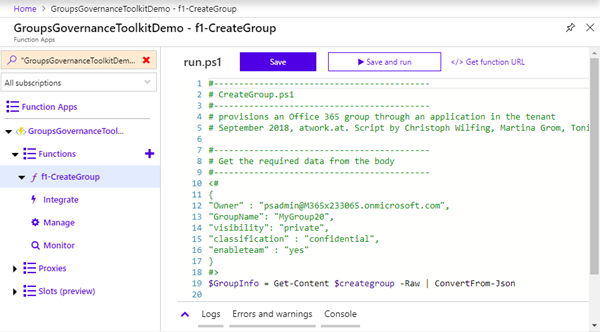
Remove the generated code and open f1-CreateGroup/run.ps1 and copy and paste the code into the editor. Then, click "Save".
Repeat the same function creation and the code pasting from f2-CreateTeam/run.ps1.
There should be these two functions existing in the Function App: f1-CreateGroup and f2-CreateTeam.
Add the function bindings
To communicate with other components, our two functions require bindings, see Azure Functions triggers and bindings concepts.
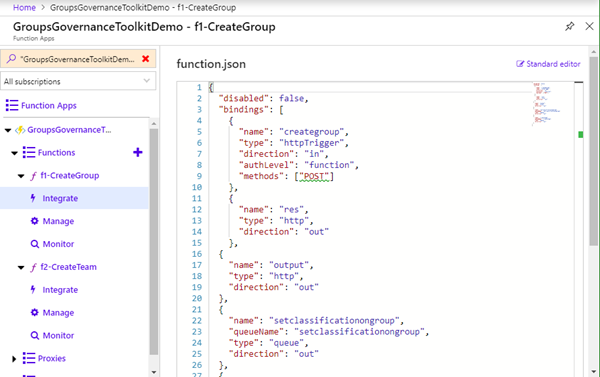
Open the f1-CreateGroup "Integrate" menu and click on the "Advanced editor" link. Copy the f1-CreateGroup/function.json content into the editor as here.
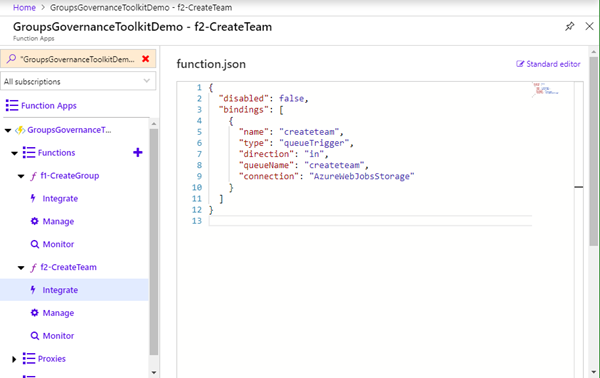
Do the same with f2-CreateTeam "Integrate" menu and click on the "Advanced editor" link. Copy the f2-CreateTeam/function.json content into the editor as here. The binding of f2 listens to a queue and starts when a group shall be provisioned as team, as Microsoft calls it "Teamify".
Done. The bindings allow to get data into the functions or to send the output of functions to other functions.
Test it with a sample payload
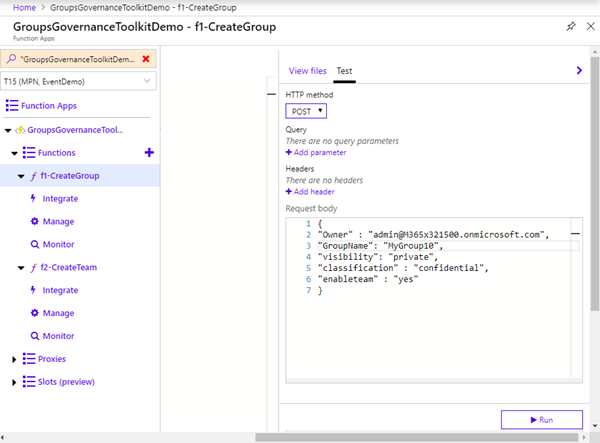
As last part in this article, we can test the creation of a new group or team with our functions. Click on the "Test" link on the right side of the f1-CreateGroup function and use a Request body as here.
{

"Owner" : "admin@M365x4711081.onmicrosoft.com",

"GroupName": "MyGroup10",

"visibility": "private",

"classification" : "confidential",

"enableteam" : "yes"

}
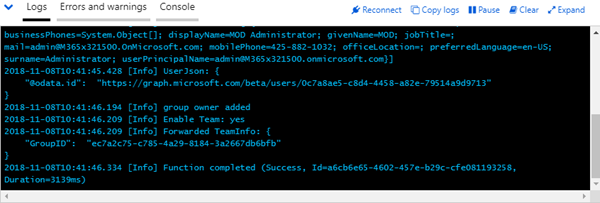
We defined these parameters in our function, because we need this data for the provisioning process. Of course, that could be extended or modified if required. Click on the "Run" button on the bottom of the page.
If the function works properly, a new group and a new team should be created with the function call.
If errors occur, check the App permissions and the Output, e.g. with the Functions "Monitor" menu or the Live Monitoring.
Check the new group
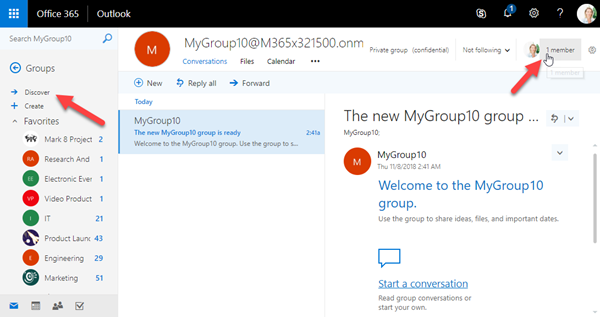
The group provisioning can take some seconds (or even minutes), depending on the tenant and the cloud workload. Anyway, usually, you can see the new group instantly in Outlook with the "Discover" link.
The user we provided as parameter should be owner of the group and can start adding his project members to that group.
More to come
Yay! We now have created the first functions to provision a new Office 365 group or Microsoft Team. The next steps for our governance demo are to monitor the groups for the compliance with our organization's policies.
Office 365 Groups Governance Toolkit series
- Part 1 – Overview
- Part 2 - Provisioning requirements
- Part 3 - Develop Azure Functions
