In part 1 of this series we described the scenario for our Office 365 groups governance toolkit. In this part we will setup a workflow for the Office 365 and Microsoft Teams provisioning. Workflows help to follow specific processes for a successful collaboration.
Offering self-services for users is a key to reduce workloads on the IT department and to allow users to cover their requirements quickly while the organization's policies are enforced during the process. A frequently asked request is how to provision a new Microsoft Team in Office 365 in a secure and monitored way. See how this can be implemented here.
To allow an app to create a Microsoft group or team programmatically in a workflow, we will use the Microsoft Graph API, Azure Functions and Flow or Logic Apps. With these technologies, we can create powerful workflows to offer a self-service for users to create a team when needed, approved by the manager and being provisioned with all the necessary properties and permissions.
A workflow to provision a new Team with Manager approval
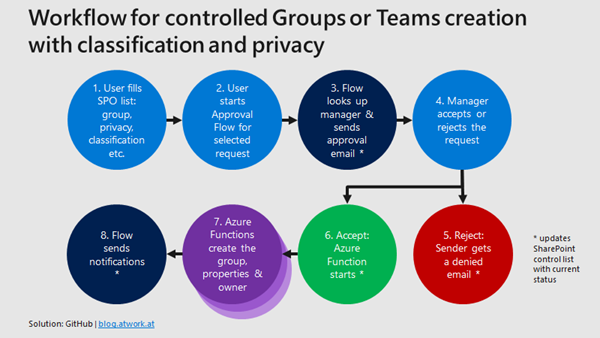
The sample workflow shall work as shown in this graphics: A user creates a groups provisioning request in a custom SharePoint list and starts the approval workflow. If the manager approves the request, an Azure Function is called that does the work. Then, the flow informs the sender about the created group or team.
In this article, we concentrate on the technical part of the groups provisioning process, shown in step 7 (Azure Functions to create the Office 365 Group).
Requirements
To get the work done, we first have to fulfill the following requirements:
- The groups classification must be set (for using it later in the provisioning process)
- An application must be created that is allowed to perform the groups provisioning operation
Set the groups classification in the tenant
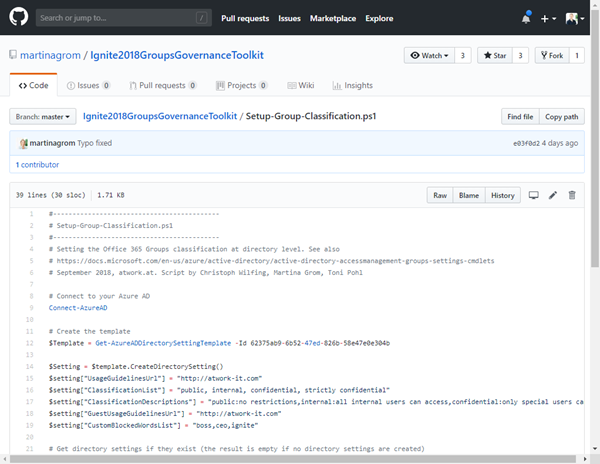
An Office 36 group can be created as Public or Private group. Additionally, a classification can be defined to inform the users about the content privacy in that group. This must be set on the Office 365 tenant level, before we can use it. So, use the following script and an editor as VSCode. You have to connect to your Azure Active Directory with Connect-AzureAD and a Global Admin account. Modify and run the script Setup-Group-Classification.ps1 from the public GroupsGovernanceToolkit repository. Be aware that this is subject to change as soon as Microsoft Information Protection is general available! (We will update the sample accordingly).
Create an app in AAD (with the new App registration)
For our app to work we need to create and register it in AAD. With this app we will access our Office 365 tenant with a custom Azure function.
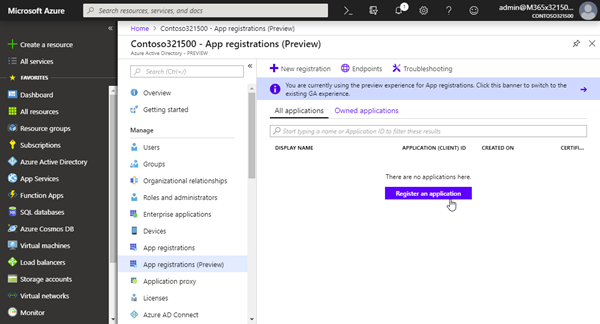
Here we create the required app in the Azure Portal. Login with a Global Admin and navigate to the AAD blade, or to the new App registrations (Preview) that was announced at Ignite. Click the "Register an application" button.
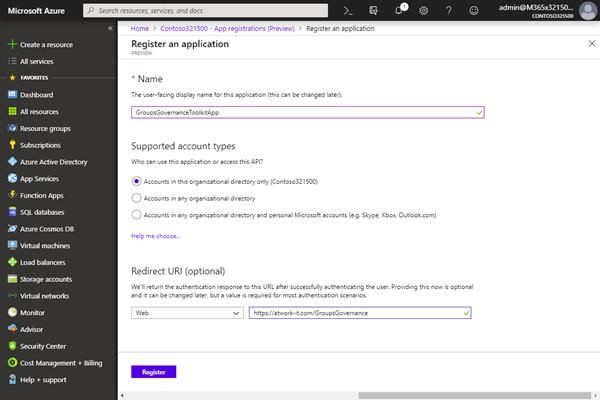
Name the app "GroupsGovernanceToolkitApp", select "Web" and provide a valid URI, as https://mycompany/myapp.
Set the app permissions
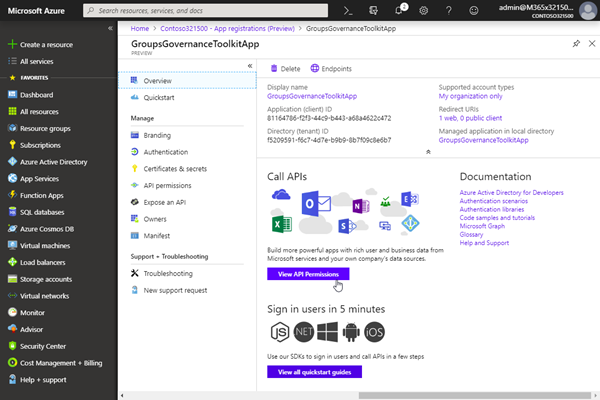
When the app was created, open the "View API Permission". To create a new Office 365 group (or a Team), the Microsoft Graph API provides methods for accomplishing that. See the documentation at
- Create group
- Create team (still in Beta, but working)
So, our app needs to have the application permission "Group.ReadWrite.All". Let's set that here.
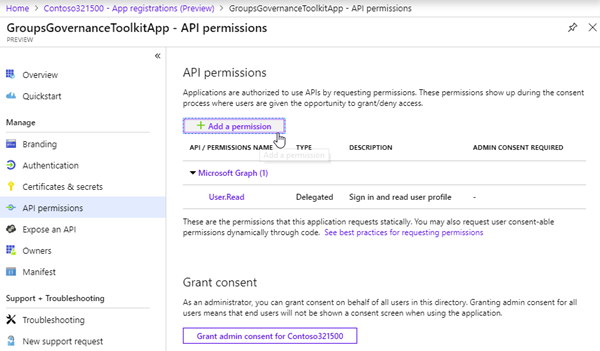
Let's "Add a permission".
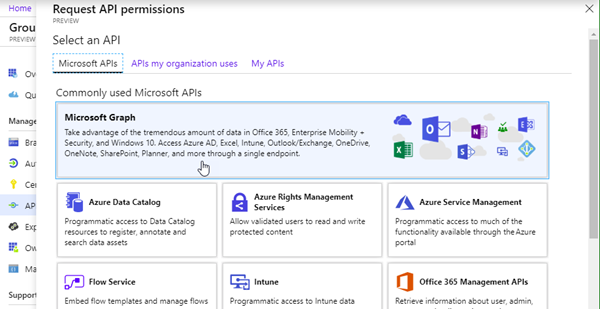
Click on "Microsoft Graph".
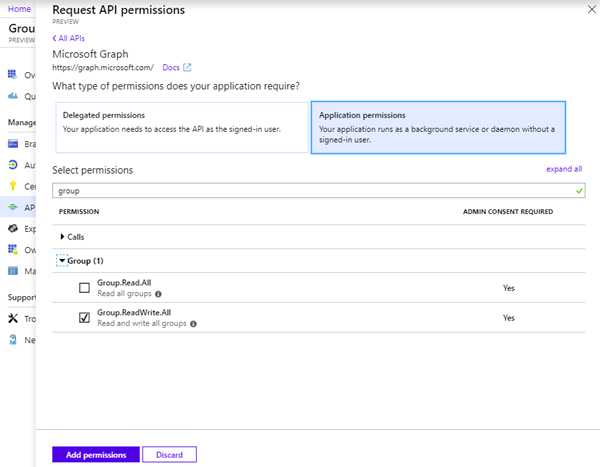
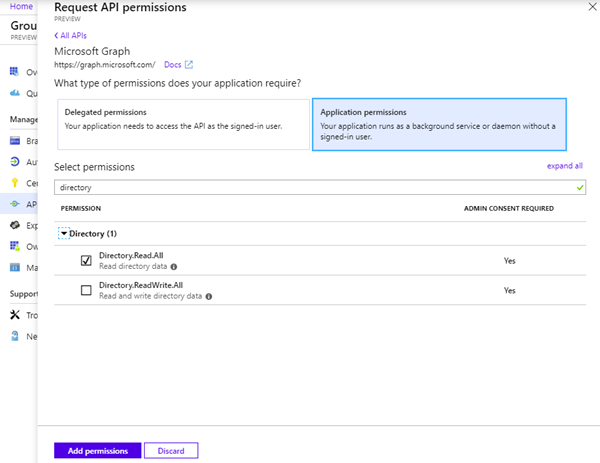
…and on "Application permissions". We want the function to be able to provision a new group or team without user interaction.
Search for "group" and select the "Group.ReadWrite.All" permission. This requires an Admin Consent as shown here.
Repeat that step for "Directory.Read.All". We need to read the user objects to set the owner of a group as well.
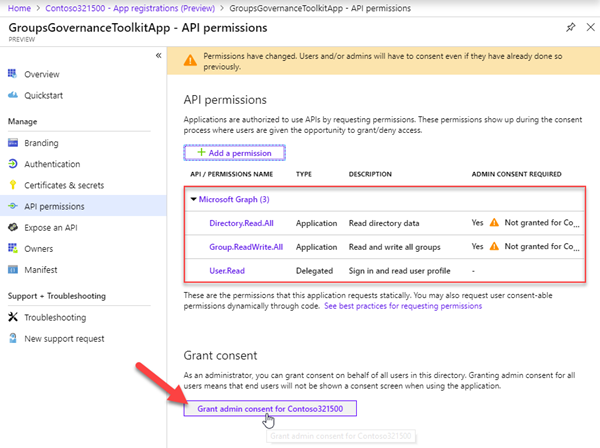
Now, the Global Admin needs to confirm the permissions of the app.
Confirm that message with "Yes".
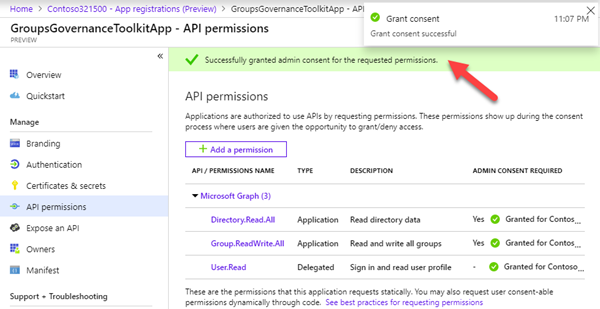
The app was successfully registered and confirmed with the required permissions.
Create the app secret
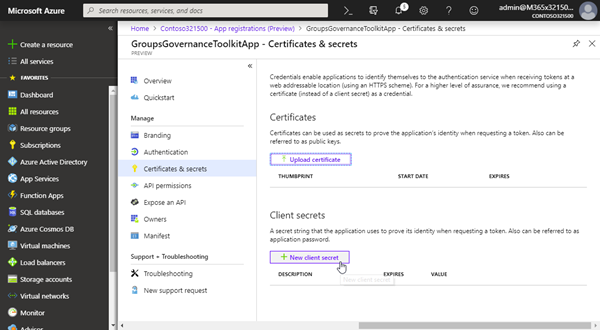
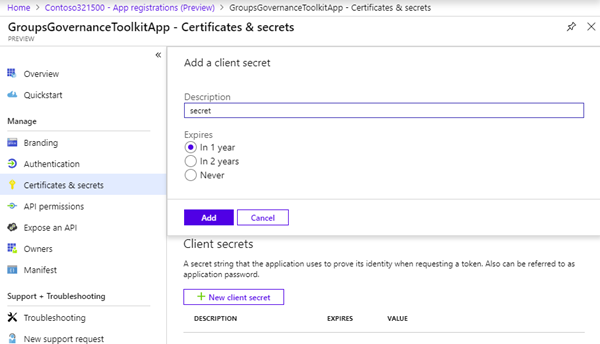
To let the App authenticate, we also need an app "password", it's named "secret" here. Click on the "Certificates & secrets" and add a "new client secret".
Name it "secret" or similar, choose the expiration (as 1 year) and add it as here.
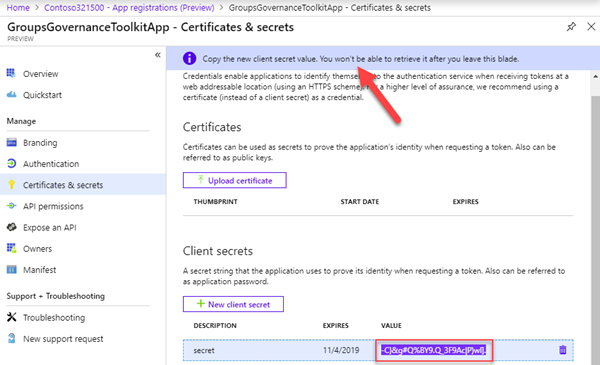
Now, copy the generated secret value – you won't get it again!
Collect all required app data
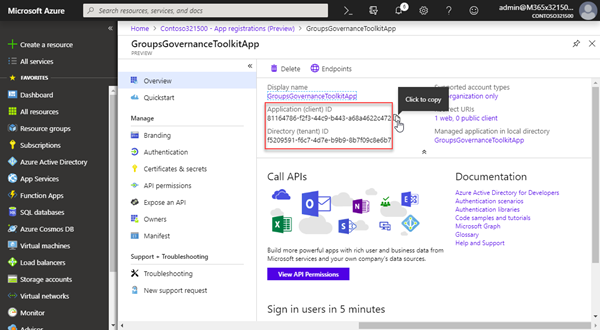
Go to the app "Overview" and copy the Application ID, the Directory ID and your secret to a text file. We need that data in our Azure functions later.
So, in our sample, our app data looks as here.
Application ID:
81164786…

Secret:
-C}&g#Q%BY9…

Tenant ID:
f5209591…
Save your app data (AppID, Secret and TenantID) in a secure place. We need that in the next steps.
(Just to mention, this app data is just for this showcase and was deleted after the completion of that article series – no need to play around ![]() .)
.)
Continue with the function code
After we have fulfilled the requirements, we continue to develop the provisioning function code in the next article.
