In the Microsoft 365 world, sometimes you want to copy a custom list in SharePoint Online to another SharePoint site in the same or in a different M365 tenant. While there are third-party tools for this, there is an easy-to-use method for such a scenario using PnP PowerShell. This article shows how it works with a step-by-step example.
PnP PowerShell
PnP PowerShell is an open-source component from Microsoft providing over 600 cmdlets that work with Microsoft 365 environments such as SharePoint Online, Microsoft Teams, and more services. We can use this simple-to-use module for our purpose. See more at PnP PowerShell overview.
In this sample, we want to copy two SharePoint custom lists from one M365 tenant to another M365 tenant and another SharePoint site. See more about SharePoint lists at Set up your SharePoint site with lists and libraries.
The Source
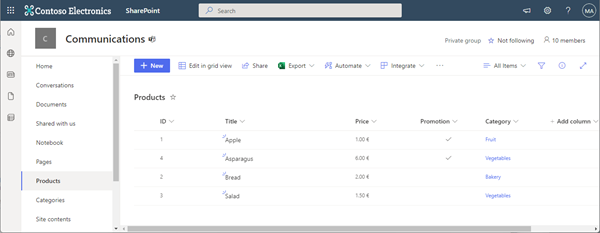
The source list on our SPO source site Communications is named Products. It´s a simple custom list with a Title, Price, Promotion and Category fields as shown here.
The Category is a lookup field depending on another custom list named Categories. This list only includes the category names Bakery, Fruit, Other, and Vegetables. In this sample, the Products list contains only 4 items. We want to copy both lists with the schema and the content to another SharePoint site.
Prerequisites for using PnP PowerShell
First, we need to install the PnP PowerShell module, see the documentation at Installing PnP PowerShell. We can do that once with the Install command (for the current user). The PnP PowerShell module runs in PowerShell 7 (.NET Core) and in Windows PowerShell 5.x (.NET Framework greater than 4.6).
Install-Module -Name "PnP.PowerShell" -Scope CurrentUser
Note: Before you can use PnP.PowerShell, you need to allow the corresponding Multi-Tenant app in your tenant for connecting with PnP PowerShell, as described at Connecting with PnP PowerShell. Run the PnP register command below. Otherwise, you get an error like this: "AADSTS65001: The user or administrator has not consented to use the application with ID '31359c7f-bd7e-475c-86db-fdb8c937548e' named 'PnP Management Shell'. Send an interactive authorization request for this user and resource." So, we run the register command (for each M365 tenant) once:
Register-PnPManagementShellAccess
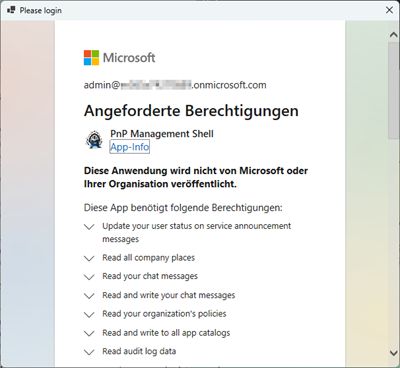
Login, and give the consent to the PnP Management Shell app. As you can see, the PnP module is large in scope and requires many permissions.
Accept the permissions. After that, this step is done.
Save the list source
Now we connect to the SharePoint Online source site1. In our sample, the source-sitename is Communications. Replace the placeholders with your data and use an administrator account of the source-tenant.
$site1 = "https://<source-tenant>.sharepoint.com/sites/<source-sitename>"
Connect-PnPOnline -Url $site1 -Credentials (Get-Credential)
# When using MFA, use this command: Connect-PnPOnline -Url $site1 -Interactive
Get-PnPTenantId
Get-PnPTenantId delivers the tenant-Id which is a GUID we do not use here. This only serves to check the successful login and the functionality of the loaded PnP module.
We now can read the list schemas of our two custom lists and store the data in the products.xml file as here:
$template = ".\products.xml"
Get-PnPSiteTemplate -Out $template -ListsToExtract "Categories", "Products" -Handlers Lists
Note: If we don´t add the ListsToExtract parameter, all lists are saved to the template file. It's usually a good idea to back up only the relevant lists, which is what we are doing here. Alternatively, an entire site or other components of a site can be saved with Get-PnPSiteTemplate and applied with Invoke-PnPTenantTemplate.
As a result, the list structure is saved in the local products.xml file, which you can examine:
Save the list data
If needed, you can copy the content of the lists as well with PnP PowerShell. Do this for each list that you want to copy all the data to. In our sample, we copy the Categories items (our lookups) and the Products items.
Add-PnPDataRowsToSiteTemplate -Path $template -List "Categories"
Add-PnPDataRowsToSiteTemplate -Path $template -List "Products"
The list data is added to the products.xml file. We see the file grew in size and now contains the list schemas and the list data. VS Code understands the XML file and shows a breadcrumb where the data starts.
This is very useful to "copy" the full list, not only the list structure. We are done in the source SharePoint site. Let´s proceed.
Copy the list to the target site
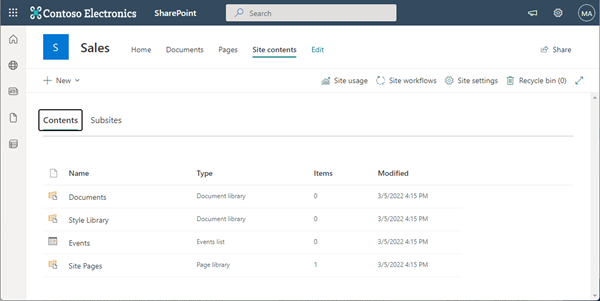
Here, we are using another M365 tenant and a brand new SharePoint Communication site named Sales. As we see, the Site contents page shows that the site is empty and only includes one Events list, but no Products or Categories list. We want to change that, use our saved data and restore the content into this target site.
Note that you need to run the registration command in the target tenant and also give your consent once in this other M365 tenant:
Register-PnPManagementShellAccess
When done, we can connect to the target site2 (the SharePoint site must be existing). Replace the placeholders with your data and use an administrator account of the target-tenant.
$site2 = "https://<target-tenant>.sharepoint.com/sites/<target-sitename>"
Connect-PnPOnline -Url $site2 -Credentials (Get-Credential)
# When using MFA, use this command: Connect-PnPOnline -Url $site2 -Interactive
When connected, we can run the magic Invoke-PnPSiteTemplate restore command, which is using our products.xml file:
Invoke-PnPSiteTemplate -Path $template
You can get a warning message, if the target site´s template is different than the source site. You can ignore this warning as we are only interested in our copy of the lists here.
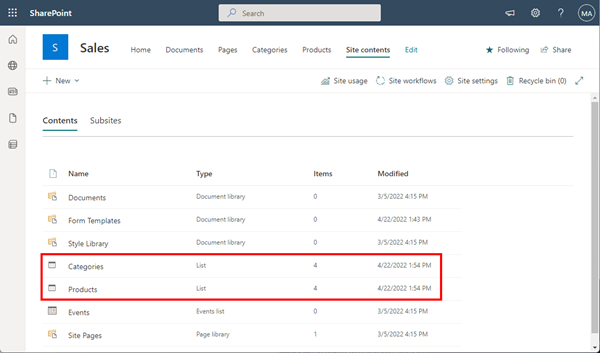
As result, we see that the two lists have been created in the SharePoint target site, including the content (4 items per list).
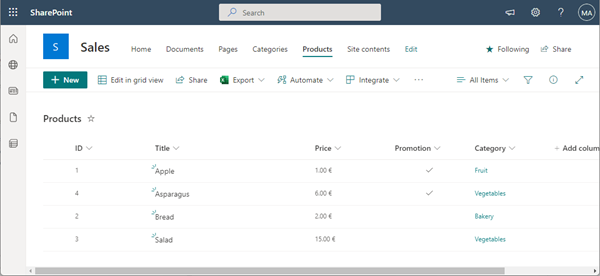
When we control the Products list, we see the copied list and the same items from the SharePoint source site.
Note: If you look closely, we see that Salad now costs 15.00 Euro, and not 1.50 Euro. This is dependent on the language settings. In our products.xml file, the price is stored as here:
<pnp:DataValue FieldName="Price">1,5</pnp:DataValue>
The target SPO site is in English, and does not understand the comma, but expects a decimal point. So, check the result and language settings during the migration process.
Summary
Mission accomplished, even with the lookup table. As you can see, it's very easy to copy SharePoint lists with PnP PowerShell.
Happy migrating your list content between SharePoint sites!
